DIY Home Projects
🏠 17 Real Ideas
⏱ Quick Read
🔥 Always Trending
17 DIY Home Projects So Pretty &
Genius You’ll Want to Try Them This Weekend
Some weekends, you just want to make something. You want to pick up a paintbrush, a drill, or a roll of peel-and-stick wallpaper and actually change something about your home with your own hands. That’s exactly what DIY home projects give you — real results, real fast, without the cost of hiring anyone. I’ve noticed that the projects people feel proudest of are almost never the most expensive ones. They’re the ones they built, painted, or styled themselves. This list covers 17 ideas that are genuinely doable, deeply satisfying, and pretty enough to photograph when you’re done. Whether you have a whole weekend or just a free afternoon, there’s something here that will make your space feel completely new.
01
Floating Shelf Build

There are few weekend builds more satisfying than a floating shelf. You cut the wood, sand it smooth, stain it, and mount it — and suddenly a blank wall has personality, purpose, and a place for every object that used to sit on your counters. It is one of those DIY home projects that feels bigger than it actually is.
The trick is the bracket. Hidden floating brackets make shelves look like they’re defying gravity, and that clean look is exactly what makes them so visually compelling. In my experience, a set of three staggered shelves in walnut stain transforms any blank wall into a focal point people genuinely comment on when they visit.
The Key: Use hidden floating brackets rated for at least 50 lbs each — they create the clean, furniture-grade look that makes shelves look custom-built.
02
Lime wash Paint Walls
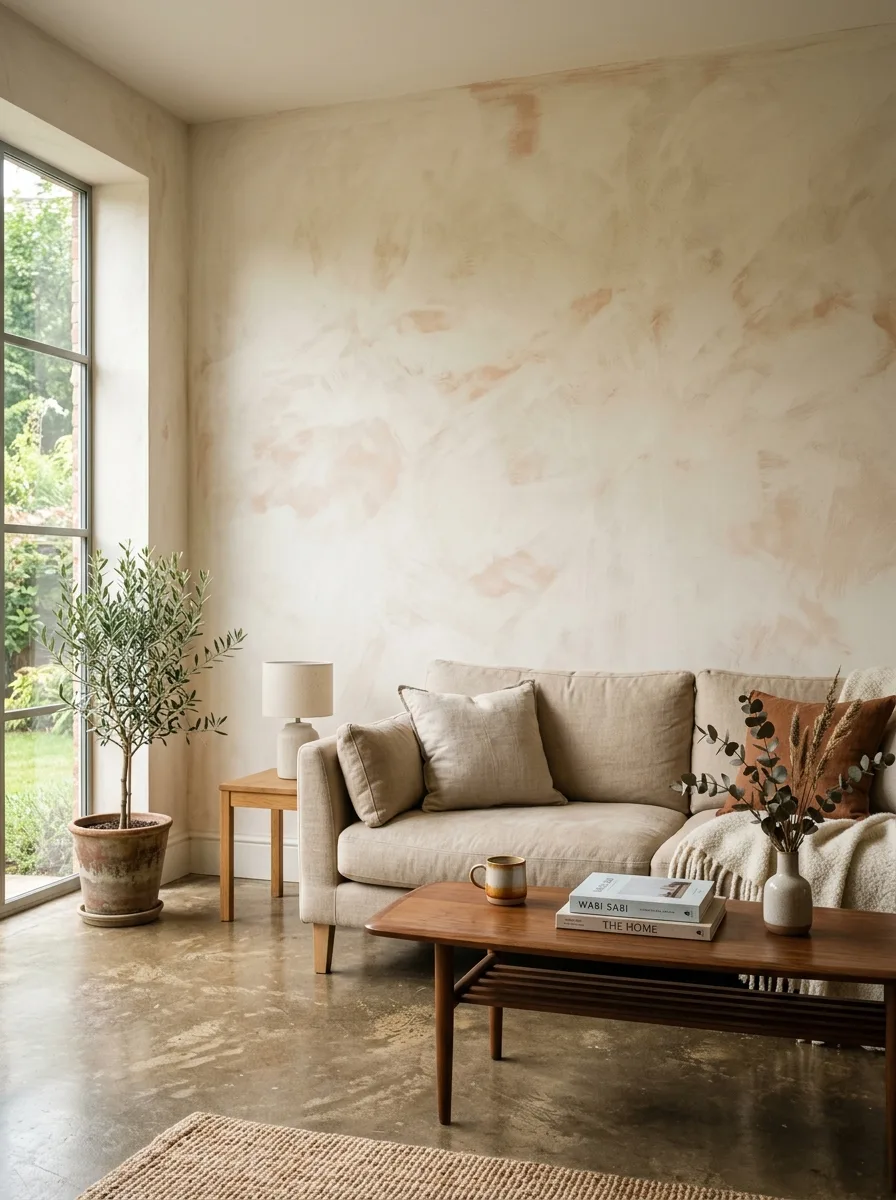
Limewash paint is one of those discoveries that makes you want to repaint every wall in your home immediately. The finish is chalky, layered, and deeply alive — it shifts color as natural light moves across it throughout the day. It looks like something from an old Italian farmhouse, but it goes up in an afternoon.
What surprises most people is how forgiving it is. Unlike standard paint, mistakes are part of the aesthetic. Brush strokes, overlaps, and uneven coverage all contribute to the organic texture that makes limewash walls so beautiful. I’ve seen beginners achieve stunning results on their very first attempt because the imperfections are actually the point.
The Key: Apply limewash in loose, X-shaped strokes and let patches dry at different rates — the variation in tone creates the natural, aged depth that makes this finish special.
03
Peel-and-Stick Backsplash
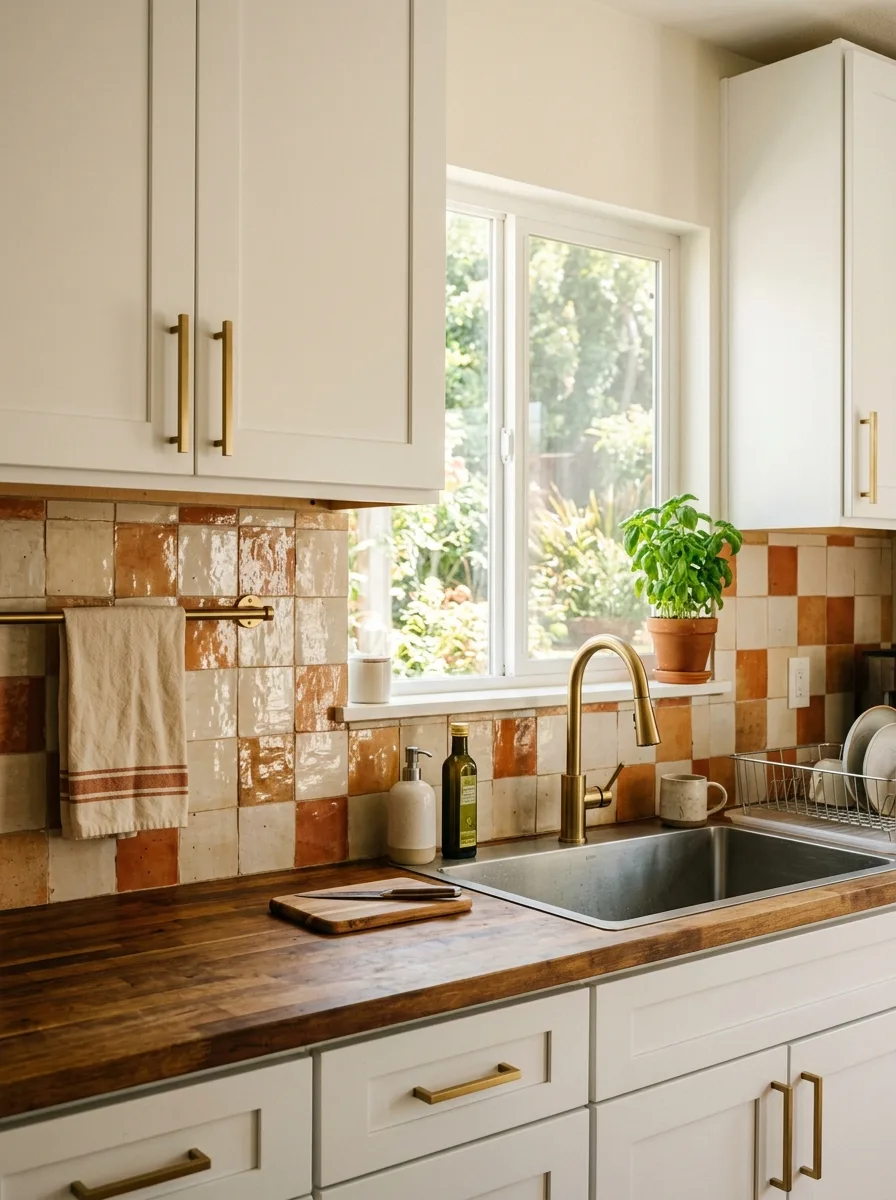
A kitchen backsplash can feel like a huge renovation commitment — until you discover peel-and-stick tile. These panels go up without tools, without grout, and without a professional, yet the finished result genuinely looks like a custom tile installation. The difference between a before and after photograph is striking every single time.
Zellige-style peel-and-stick panels in warm cream or terracotta are currently among the most pinned kitchen updates on the internet — and for good reason. They add the kind of handcrafted texture and warmth that modern kitchens desperately need. Install them on a Saturday morning and your kitchen looks like a completely different room by lunchtime.
The Key: Clean the wall surface thoroughly with isopropyl alcohol before applying tiles — proper adhesion is the entire difference between panels that last and panels that peel
04
Painted Cabinet Refresh
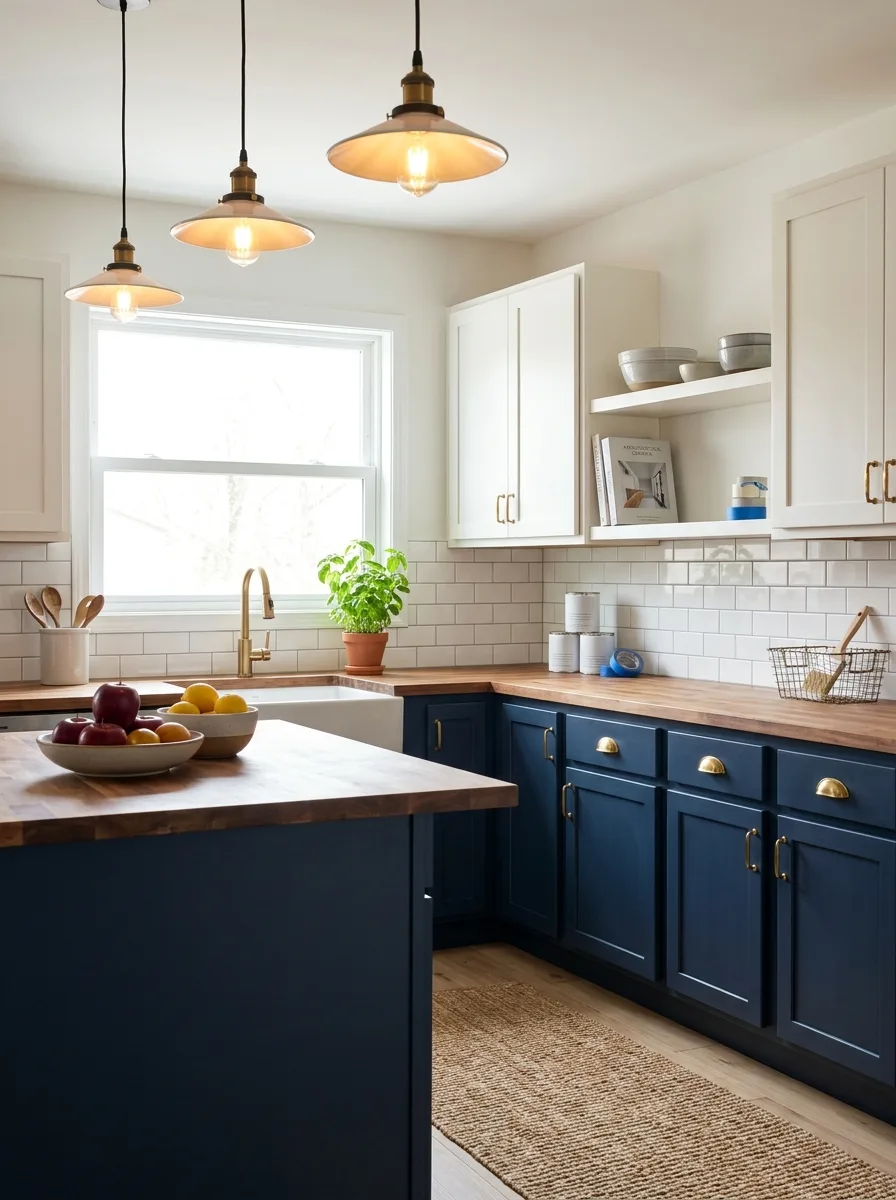
Replacing kitchen cabinets costs thousands. Painting them costs a few hundred dollars and a weekend of your time — yet the visual transformation is almost identical. A coat of deep navy or warm sage on lower cabinets with new brass hardware turns an outdated kitchen into something that looks freshly renovated and intentionally designed.
The hardware swap alone is worth doing even if you never pick up a paintbrush. Swapping old chrome or plastic pulls for solid brass cup handles takes about thirty minutes per cabinet door and changes the entire personality of the kitchen. It is one of those upgrades that takes so little effort relative to how dramatically it shifts the room.
The Key: Use a mini foam roller on flat cabinet faces for a smooth, brush-stroke-free finish that looks factory-sprayed rather than hand-painted.
05
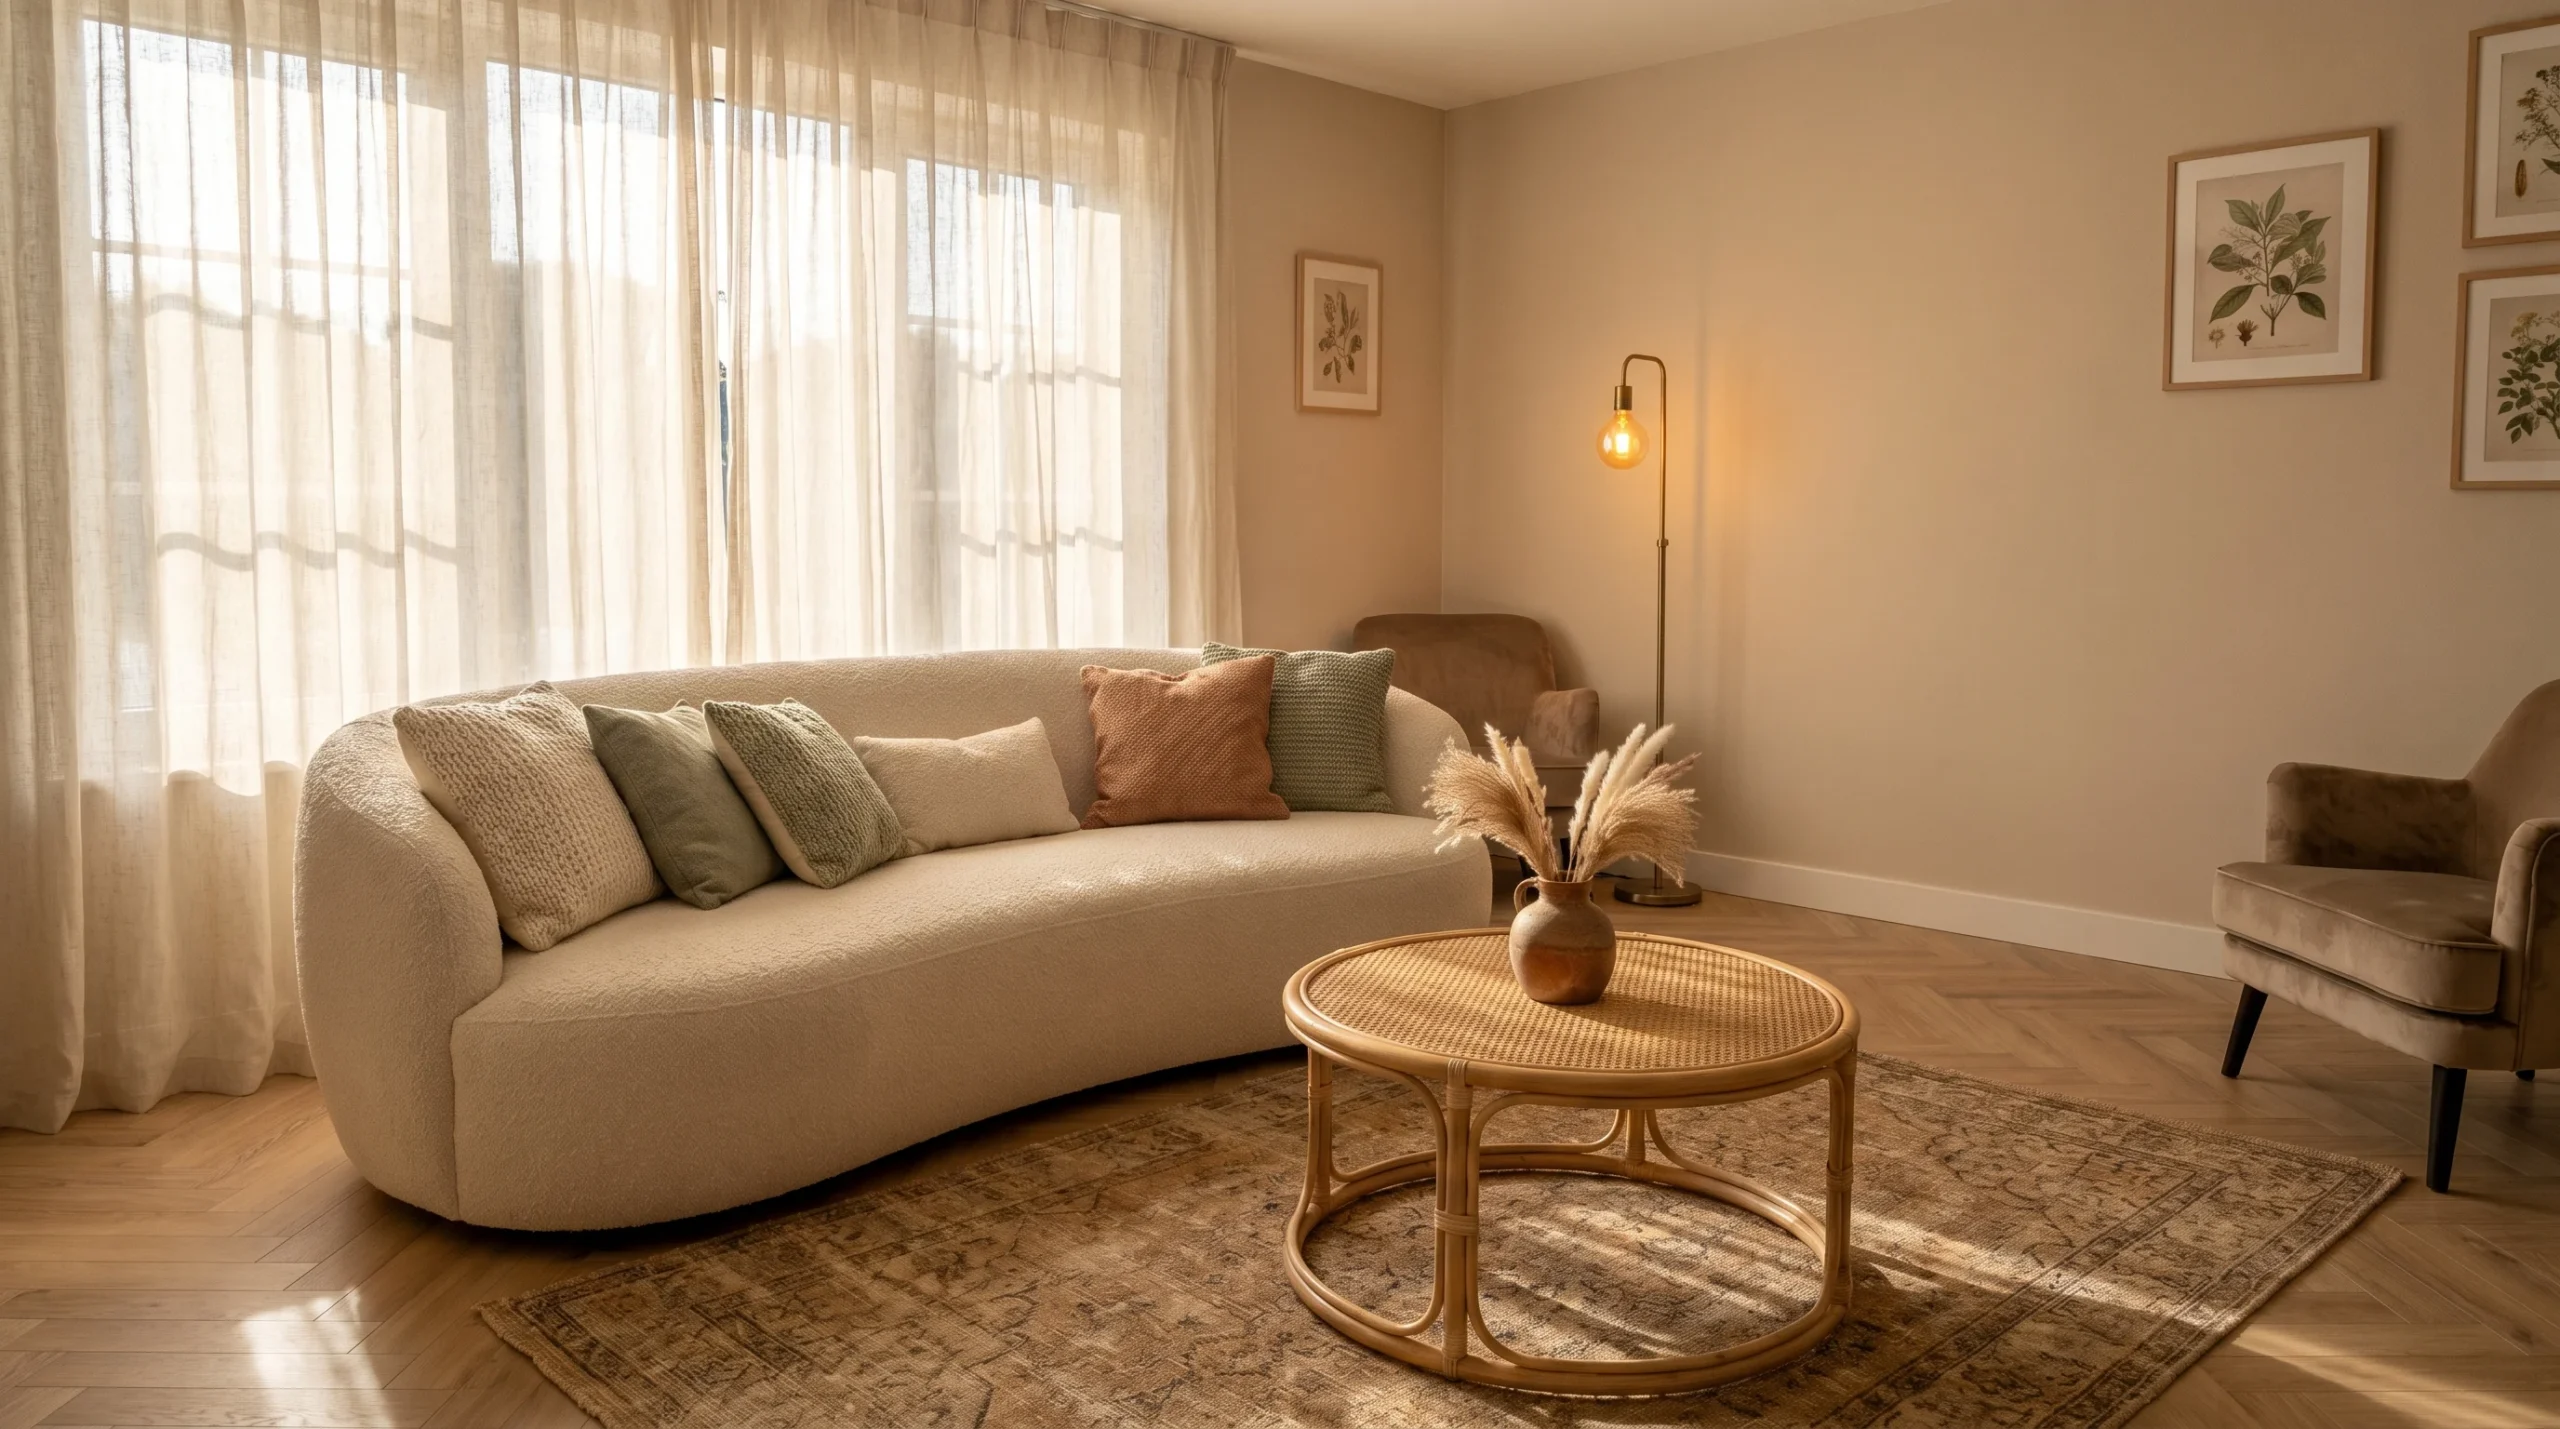
Macramé Wall Hangings
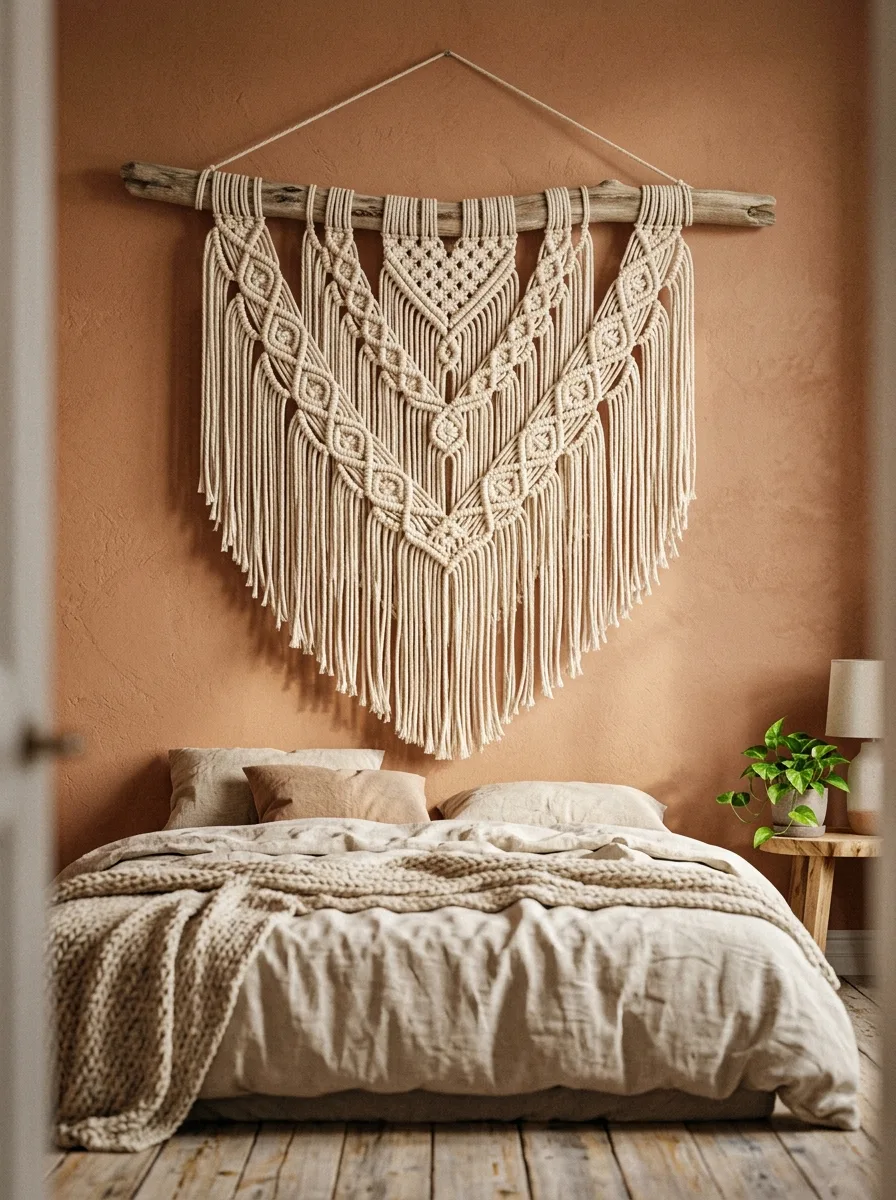
Macramé has a way of making a blank wall feel instantly warm and handcrafted. There is something deeply satisfying about creating a piece of wall art entirely with your hands and a length of cotton cord — and the finished piece has a texture and organic quality that no print or canvas can replicate.
Beginner-friendly patterns are widely available and require only three basic knots to complete. A square knot wall hanging over a bed or behind a sofa transforms bare wall space into a soft, layered focal point that guests always notice and ask about. I’ve noticed that handmade items carry an energy in a room that bought decor simply doesn’t have.
The Key: Choose 5mm single-strand cotton cord for beginners — it’s thick enough to show knot detail clearly and forgiving enough to undo and redo without fraying.
06
Wood Slice Centerpiece

A single natural wood slice can anchor an entire dining table. That organic edge, that visible grain, that earthy texture — it brings the outside in and creates a warmth that a glass or ceramic centerpiece simply cannot match. Style it with a candle, a small eucalyptus sprig, and a linen napkin and you have a tablescape worth photographing.
The best part about this project is how little it actually involves. Sand a wood slice smooth, apply a food-safe oil or wax finish, and let it dry overnight. The result is a beautiful, functional piece that looks like it cost far more than the few dollars most wood slices sell for at craft stores and lumber yards.
The Key: Apply two coats of food-safe mineral oil and let each coat soak in for 24 hours — this protects the wood, deepens the grain color, and gives the surface a rich, natural sheen.
07
Concrete Planter Pour
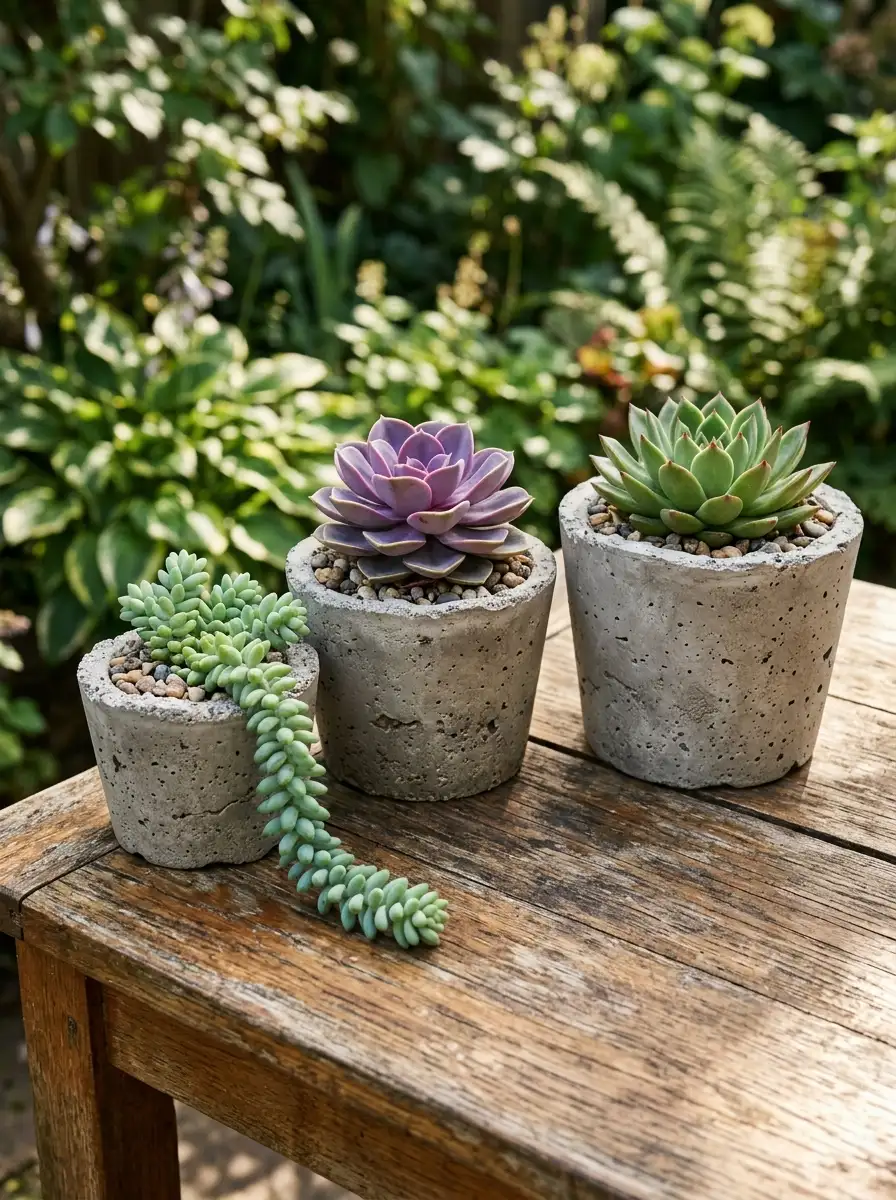
Concrete planters have an architectural quality that plastic and terracotta pots just don’t. That matte grey surface, the slight weight, the industrial texture — they make even a simple succulent look like a considered design choice. And the fact that they’re genuinely easy and cheap to make at home makes them one of the most satisfying weekend projects you can do.
Mix concrete, pour into plastic bowl molds of different sizes, let cure for 48 hours, and unmold. That’s the entire process. I’ve seen people make a set of six planters in an afternoon and arrange them on a windowsill or outdoor table for a result that looks like it came from an expensive boutique home store.
The Key: Use a plastic inner mold slightly smaller than your outer mold to create a planting cavity — remove it after the concrete sets but before it fully cures for easy extraction.
08
Renter-Friendly Wallpaper
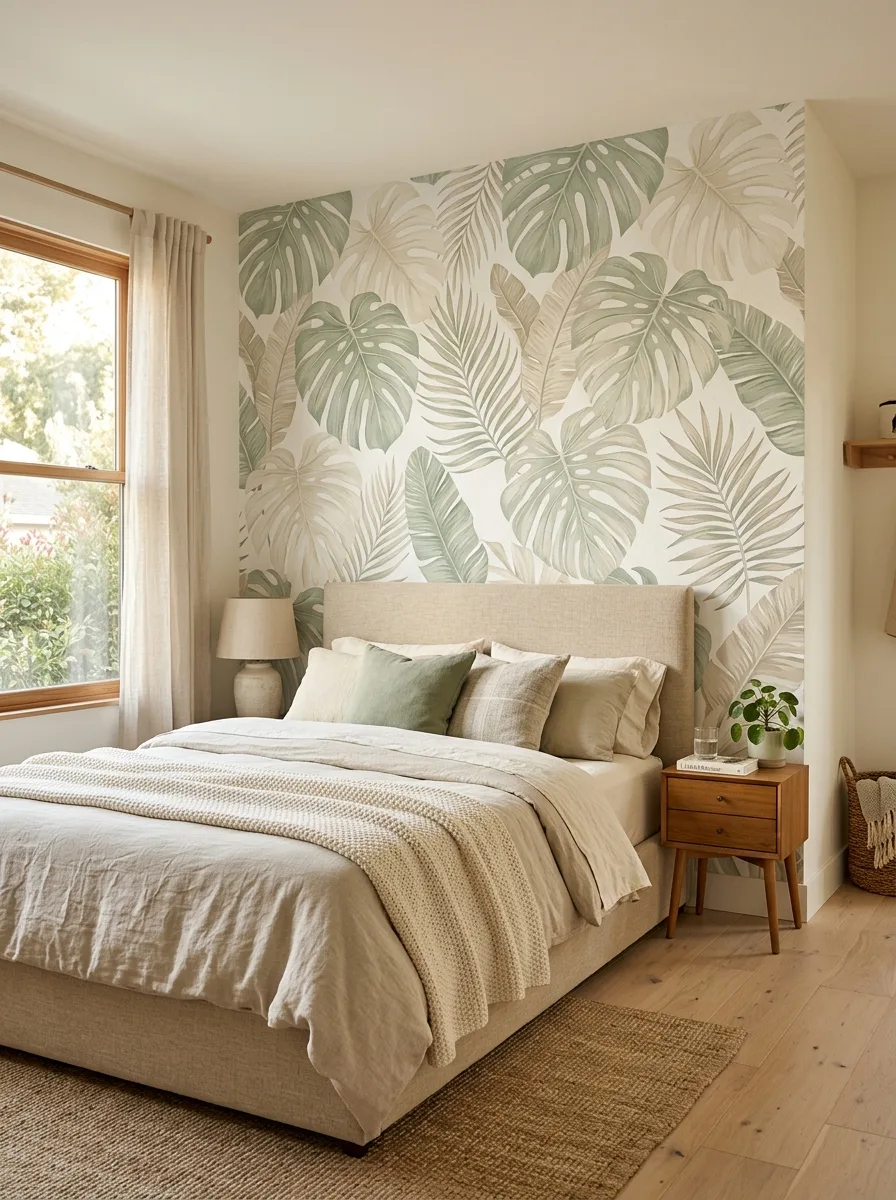
Removable wallpaper changed everything for renters. Now, anyone in a lease can add a dramatic botanical accent wall, a bold geometric bedroom feature, or a moody powder room transformation — and remove every panel cleanly when they move out. The rental excuse for living with blank white walls no longer holds.
The prints available today are genuinely beautiful. Soft sage botanical leaves, warm terracotta arches, dusty blue geometric patterns — the quality has improved so dramatically that even up close, the textured surface of premium peel-and-stick wallpaper is difficult to distinguish from traditional wallpaper. One accent wall creates a room that looks completely intentional and deeply styled.
The Key: Hang a plumb line with a level before you start the first panel — a straight vertical guide prevents the entire wall from gradually shifting off-alignment as you work.
09
Upcycled Thrift Frames
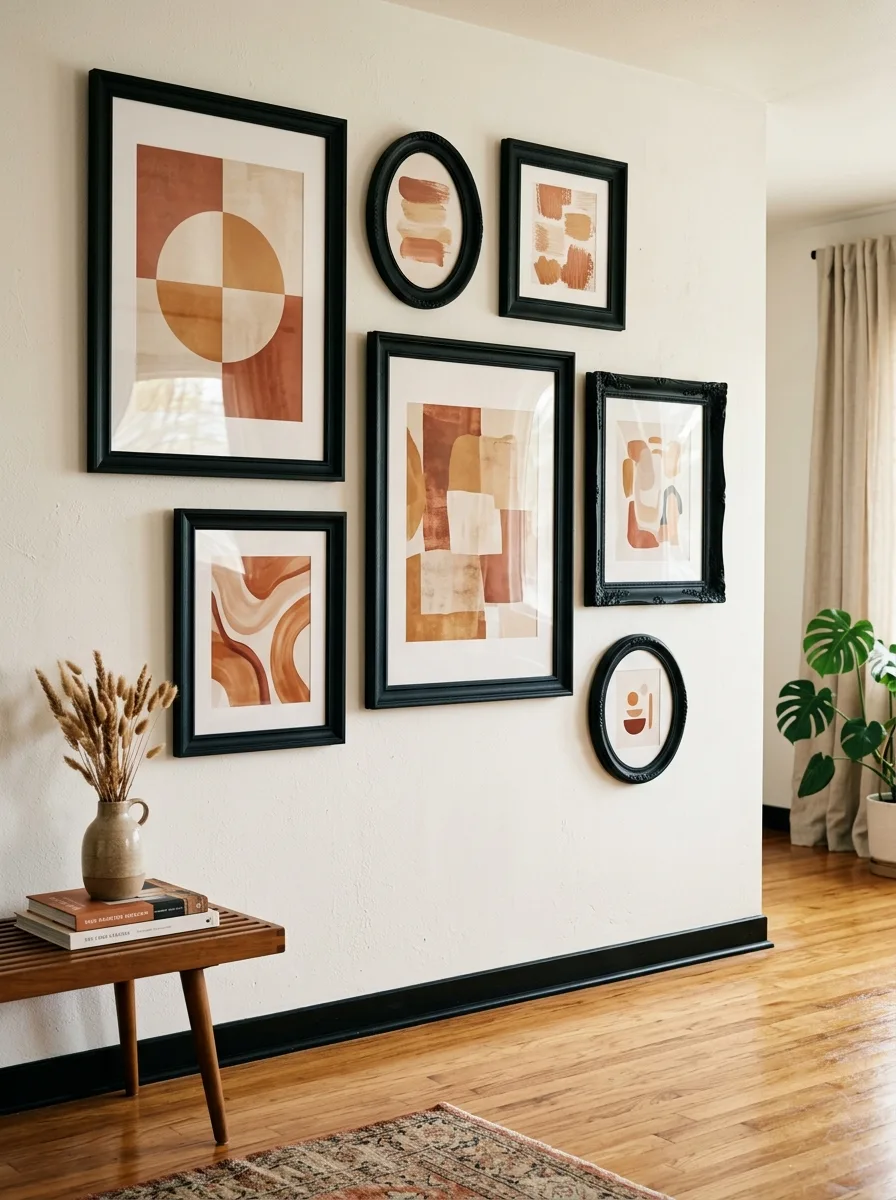
Thrift stores are full of frames in the wrong color. The solution is simple — a single can of spray paint. Collect six to ten frames in different sizes, spray them all the same shade of matte black or warm brass, and you have the foundation of a gallery wall that looks completely cohesive and intentionally designed.
The art inside barely matters after that. Even simple abstract prints downloaded and printed at home look polished inside a well-chosen frame. I’ve noticed that the biggest visual upgrade in a gallery wall almost always comes from the frame treatment, not the artwork itself. When the frames match, the entire wall reads as a curated collection rather than a random assortment.
The Key: Lay all frames on the floor and arrange your gallery wall composition before marking a single nail hole — it saves time, stress, and extra holes in the wall.
10
Painted Staircase Runner
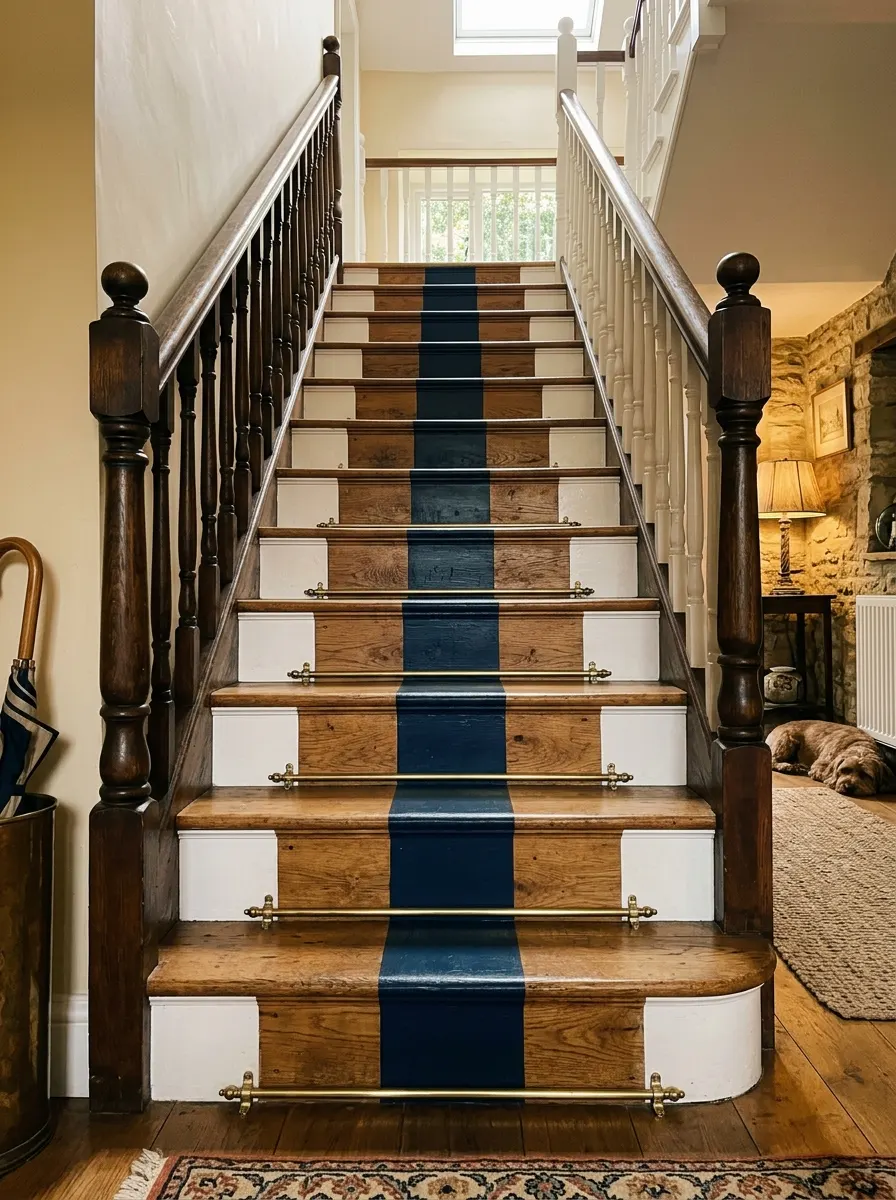
A staircase painted to mimic a runner is one of those ideas that stops people mid-scroll every single time. The concept is so clever — tape off a centered stripe on each step, paint it in deep navy or forest green, and the staircase transforms from a plain architectural feature into a statement detail people assume cost a small fortune.
Porch and floor enamel is the right paint choice here. It handles foot traffic, is easy to clean, and holds its color far longer than regular interior paint. The whole staircase typically takes one day — tape on Friday evening, two coats Saturday, and by Sunday you have a staircase that genuinely looks like a design feature rather than a plain necessity.
The Key: Use floor and porch enamel paint in a satin or semi-gloss finish — it handles daily foot traffic and cleans easily without chipping or scuffing the way flat paint would.
11
Pegboard Tool Wall
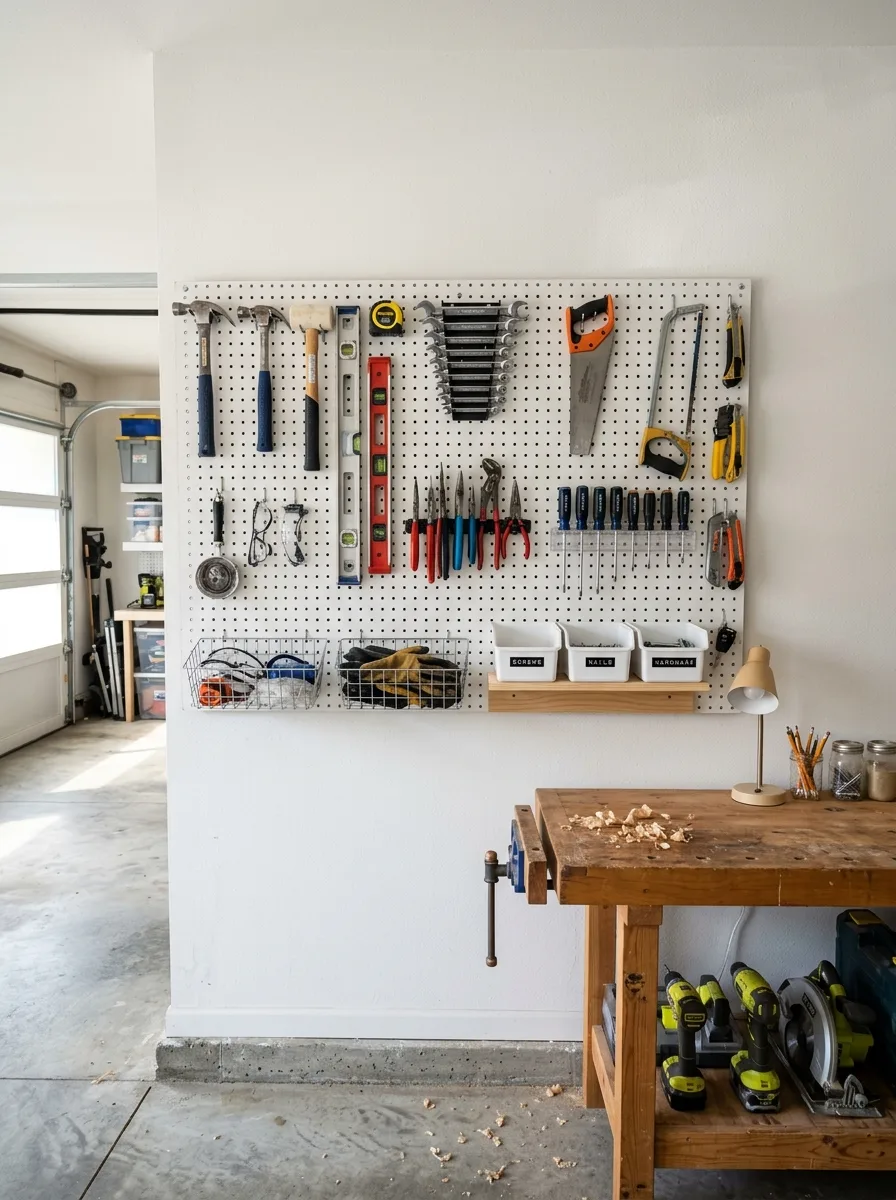
A pegboard wall is one of those practical DIY home projects that makes your daily life noticeably better. Everything is visible, everything is accessible, and the act of putting things back where they belong suddenly feels satisfying rather than tedious. For any room that struggles with clutter, this is the most functional upgrade you can make in a single afternoon.
Paint the pegboard the same color as the wall behind it and the effect shifts from utilitarian to intentional. The board almost disappears, and the tools and accessories floating on it become the visual feature. In a craft room or home office, a pegboard wall becomes a styled organizational system that photographs as beautifully as it functions.
The Key: Mount pegboard with one-inch standoff spacers between the board and the wall — without that gap, hooks can’t engage the holes and the whole system becomes unusable
12
DIY Woven Headboard
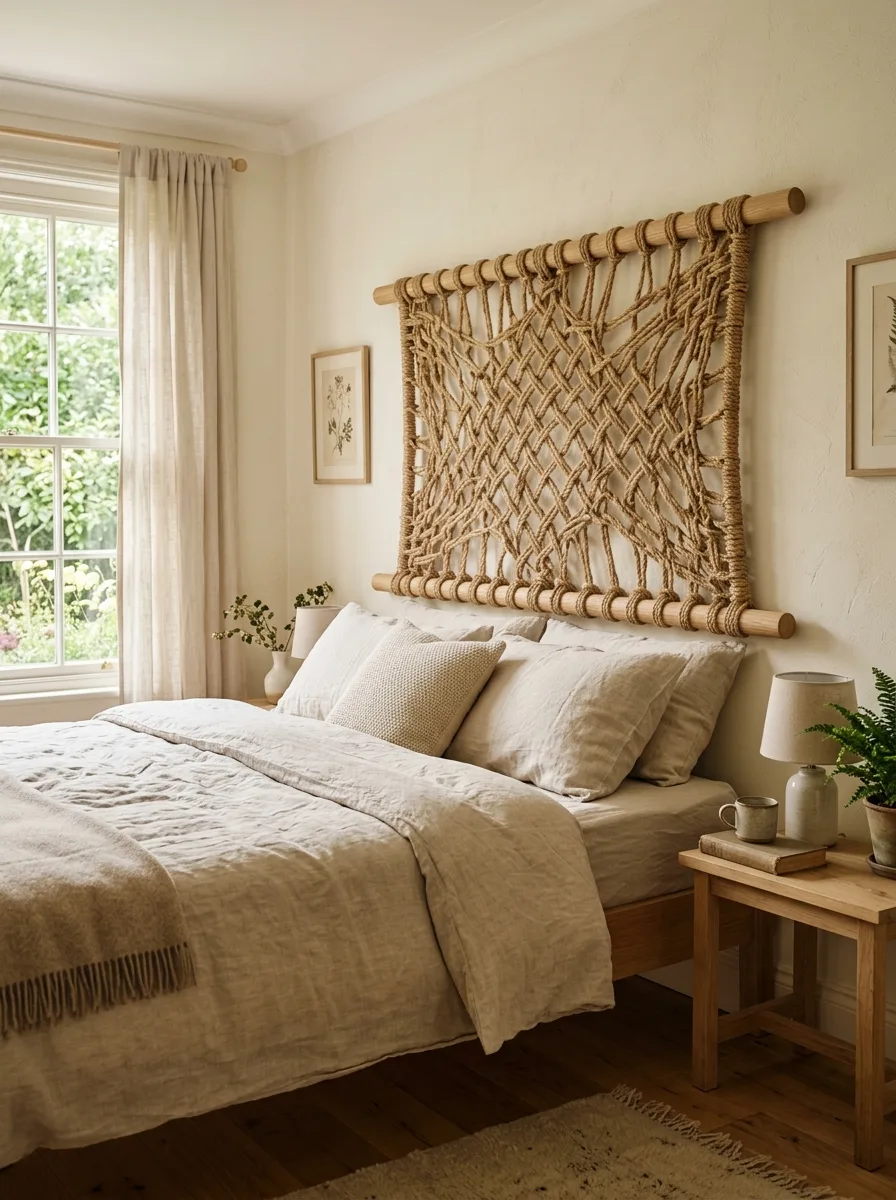
A bed without a headboard feels unfinished. But upholstered headboard frames can cost hundreds of dollars — which is exactly why this woven version is such a satisfying solution. Two wooden dowels, a length of thick jute or cotton rope, and an afternoon of weaving creates a headboard that looks handmade in the best possible way.
The visual texture is remarkable. Those interwoven ropes catch the morning light in a way that flat upholstered panels never do, and the organic warmth of natural fiber makes a bedroom feel genuinely cozy rather than just styled. Mount it directly to the wall behind the bed and it becomes the room’s most personal and visually interesting feature.
The Key: Space your warp cords evenly at one-inch intervals before starting to weave — consistent spacing creates a tight, professional-looking pattern rather than an irregular, amateur result.
13
Herb Garden Frame
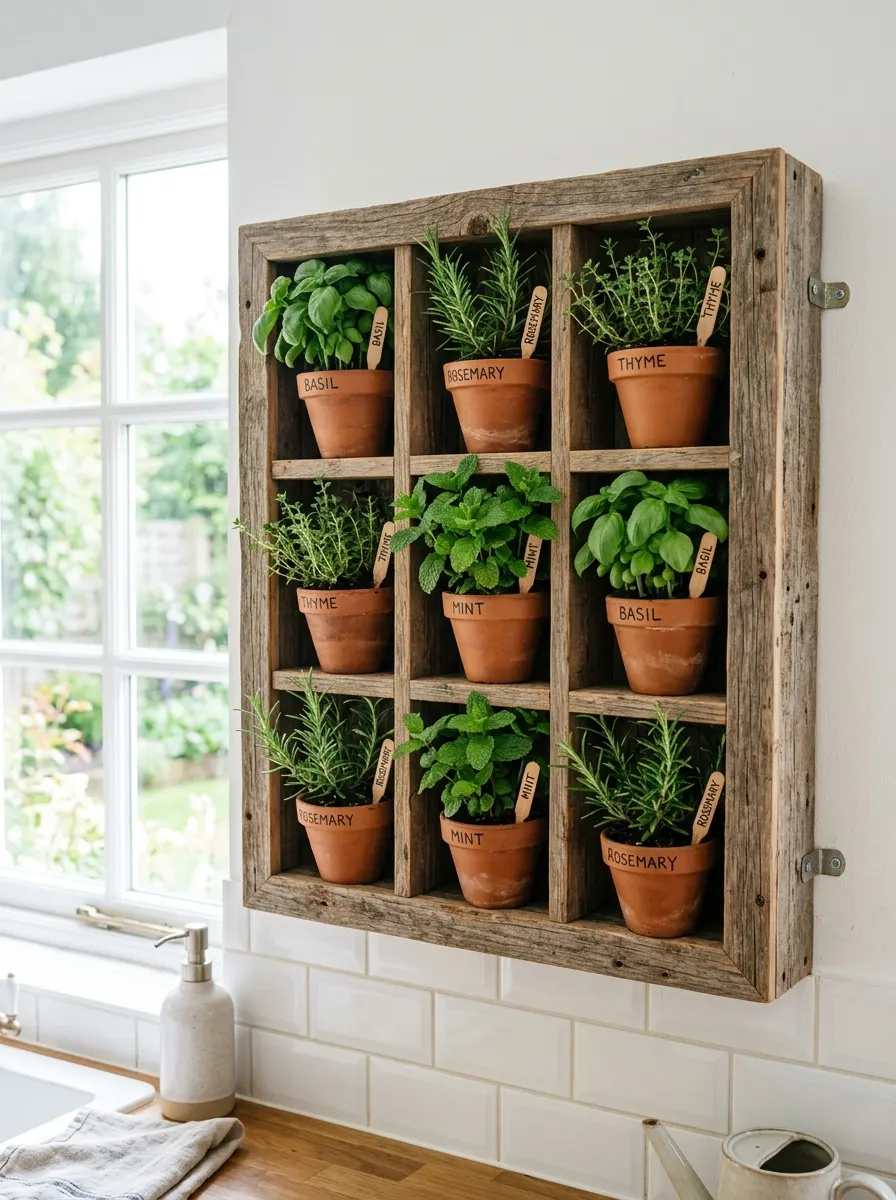
Fresh herbs transform cooking and a wall herb garden transforms a kitchen. That small wooden frame mounted beside the window — filled with basil, rosemary, thyme, and mint in terracotta pots — brings a garden into the most functional room in the home. It is simultaneously beautiful, useful, and deeply satisfying to build.
The frame is the project. A simple reclaimed wood frame with small shelf brackets or pot hooks inside takes about an hour to build and paint. Once mounted and planted, it becomes the most characterful corner of the kitchen — a living piece of decor that smells incredible, feeds your cooking, and grows more full and lush every week.
The Key: Face the herb garden toward your brightest window — most culinary herbs need at least six hours of direct sunlight daily to stay healthy and productive.
14
Refinished Furniture Flip
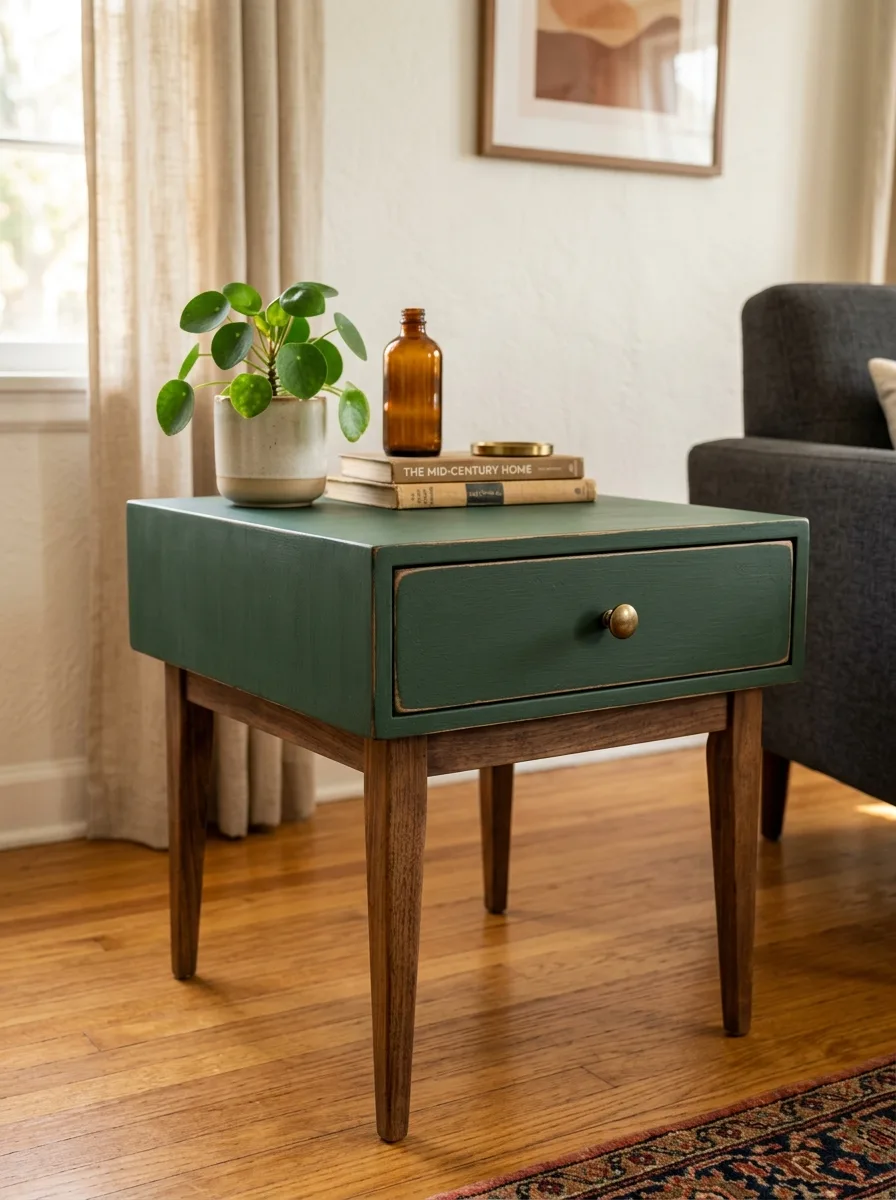
Furniture flipping is one of those weekend activities that starts as a project and becomes a habit. You find a sad little side table at a garage sale for five dollars, paint it in deep forest green chalk paint, swap the hardware for a brass pull, and the result looks like something from a curated furniture boutique. That transformation is genuinely addictive.
The combination that works best right now — and photographs the most beautifully — is chalk paint on the upper body paired with natural or lightly stained wood legs. The contrast between the matte painted surface and the warm wood creates that collected, layered quality that makes a piece feel both vintage and contemporary at the same time.
The Key: Apply chalk paint in thin layers and let each one dry fully before adding the next — thin coats prevent streaking and create a smooth, even coverage that thicker coats never achieve.
15
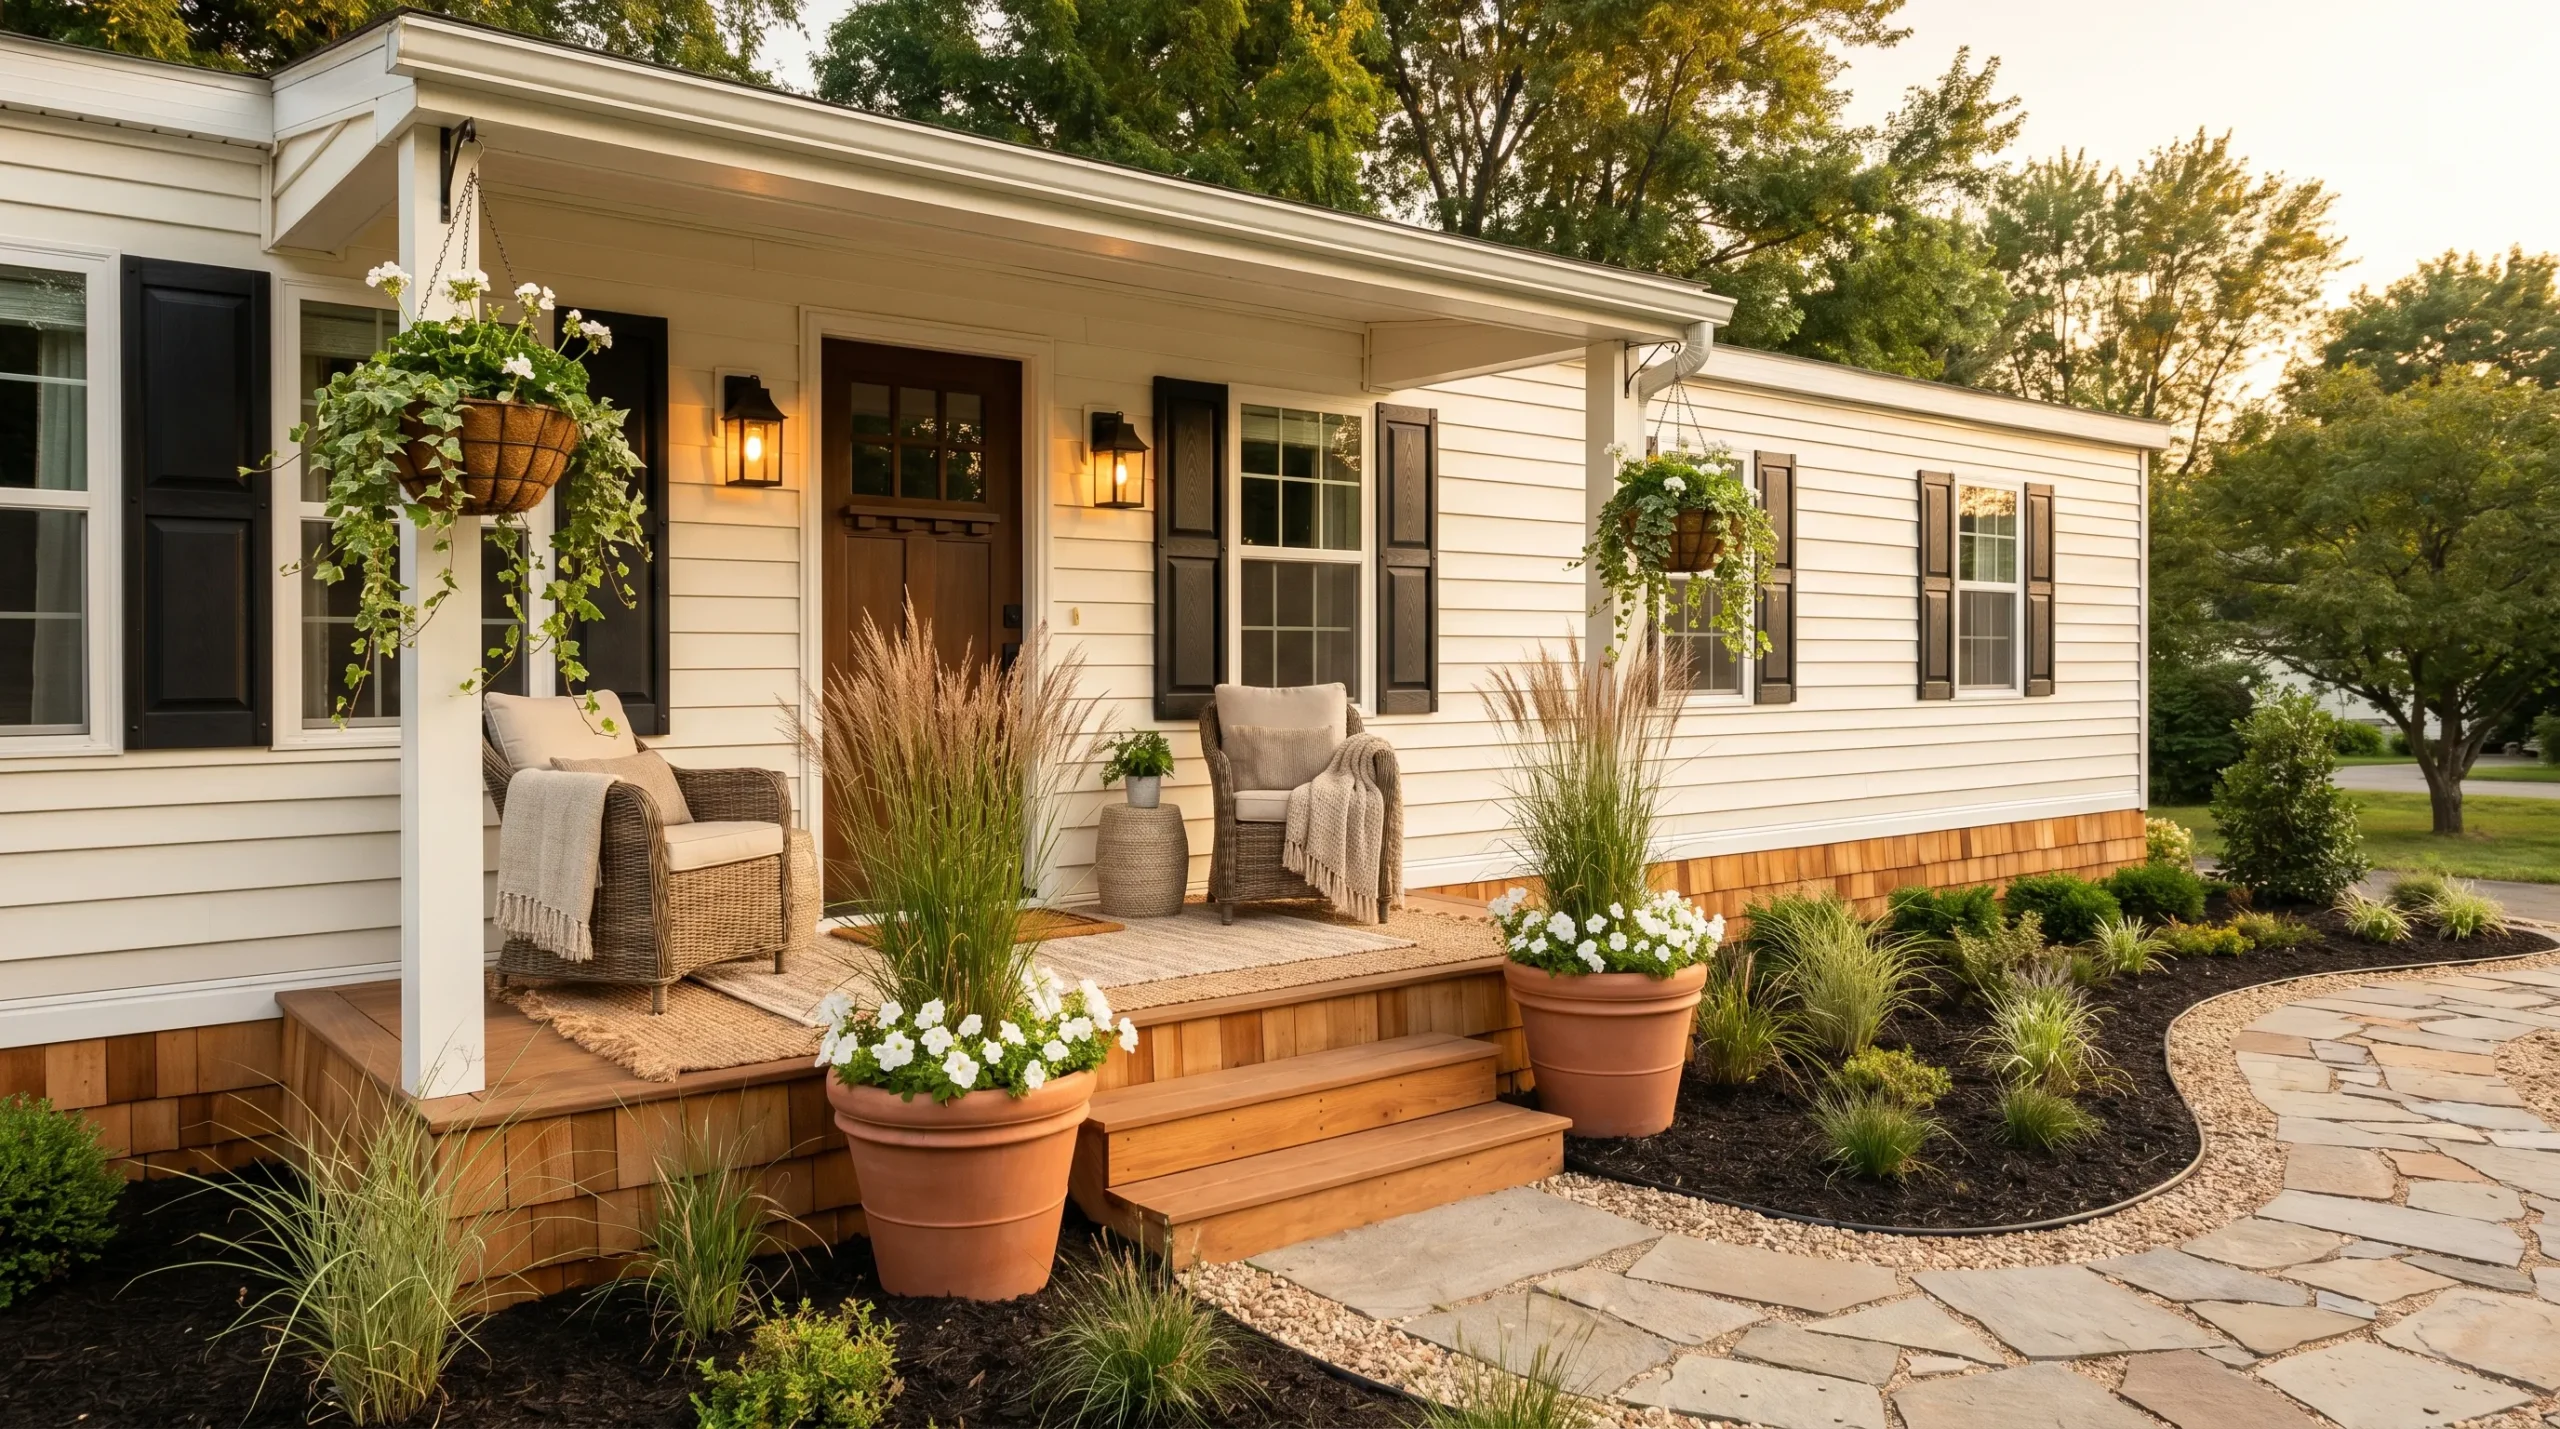
Outdoor Planter Bench
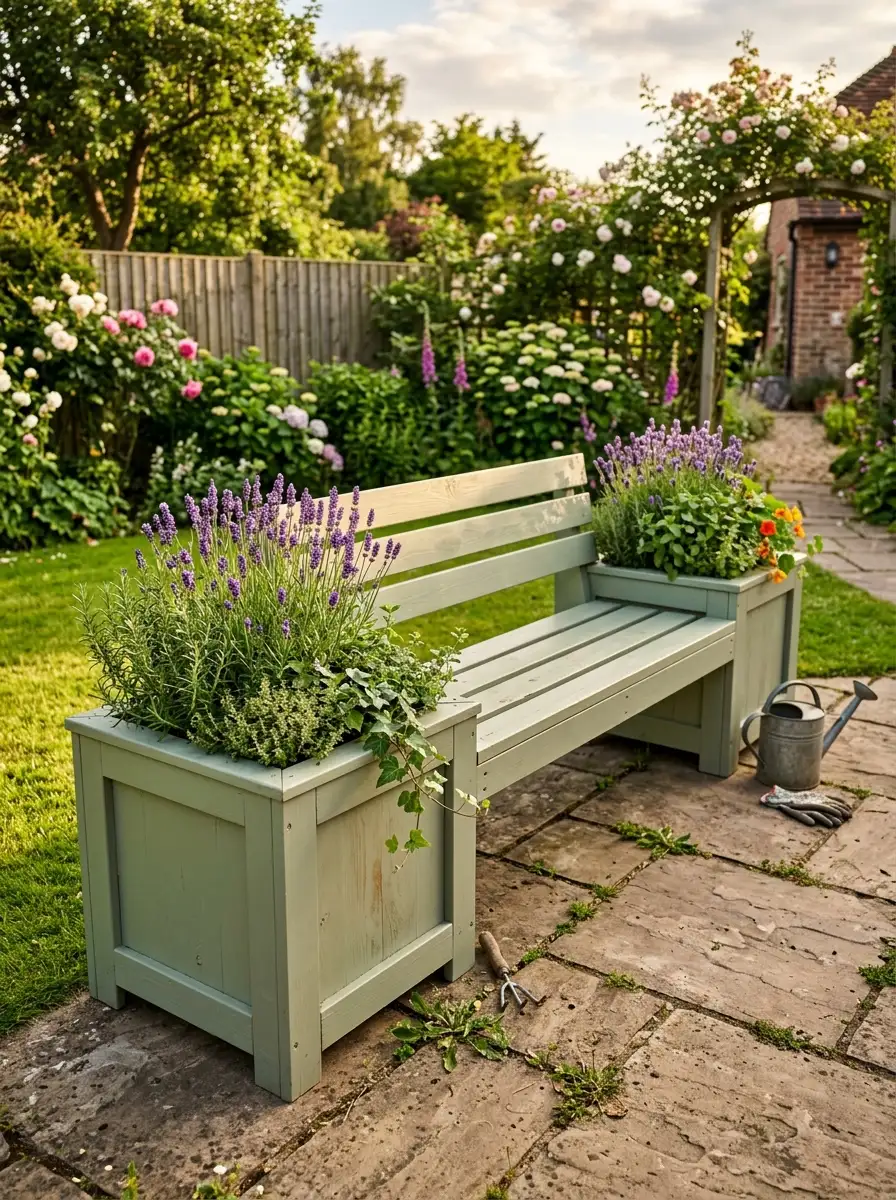
A planter bench is exactly the kind of project that makes a backyard look intentionally landscaped rather than randomly arranged. It creates seating, adds greenery, and functions as both furniture and garden feature in a single structure. Place one on either side of a front porch or along a garden path and the exterior of your home instantly looks more designed.
Cedar is the best wood choice for outdoor builds because it resists rot and insects naturally without chemical treatment. It also ages to a beautiful silver-grey if left unfinished, or holds painted finishes well if you want a specific color. Sage green is currently the most pinned shade for outdoor furniture — it sits beautifully against any garden backdrop.
The Key: Pre-drill all screw holes before assembling to prevent wood from splitting — this is especially important near the ends of boards where splitting is most likely to occur.
16
Candle Making at Home
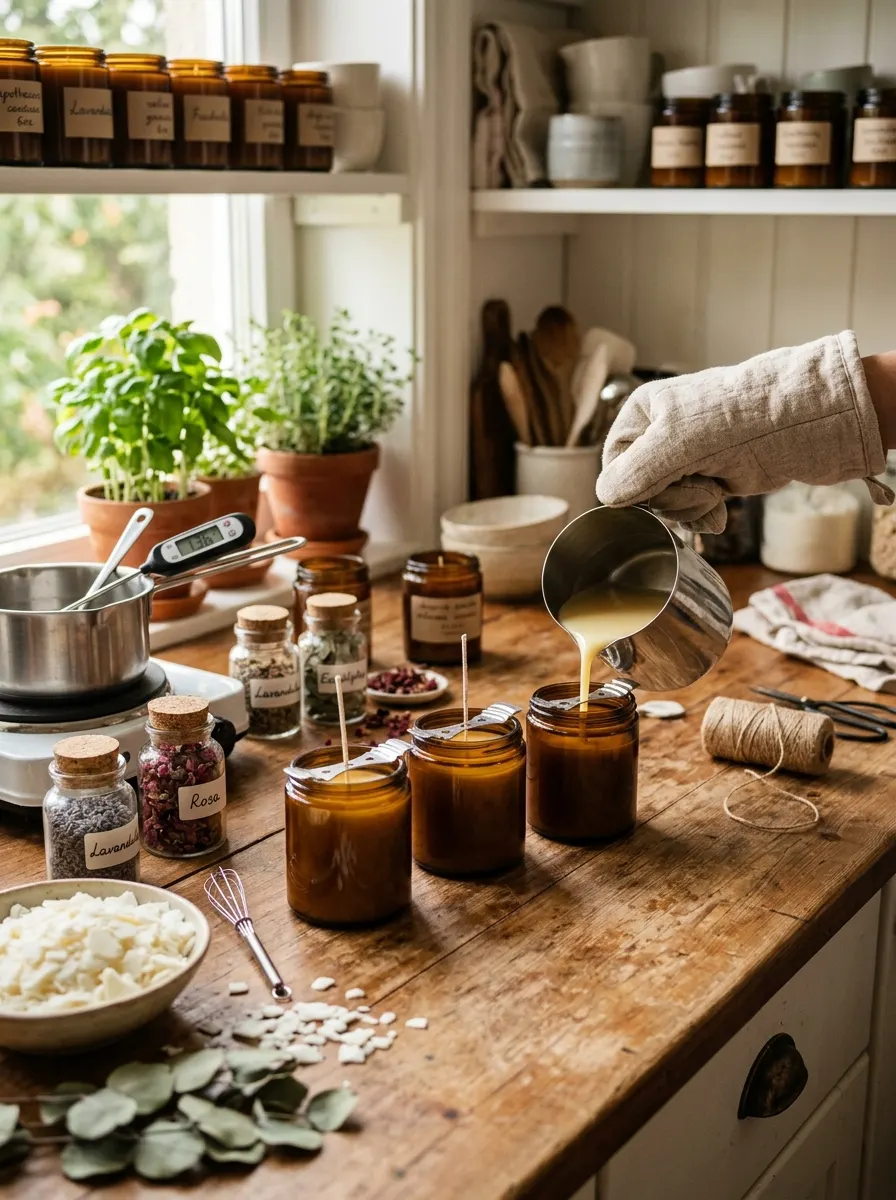
Candle making sits at that rare intersection of craft project and self-care ritual. Melting wax, blending fragrance, pouring into beautiful vessels — the process itself is soothing before you’ve lit a single wick. And the result is a collection of custom-scented candles that looks and smells as good as anything from a boutique, at a quarter of the cost.
Soy wax is the best starting point for beginners. It melts easily, throws fragrance beautifully, and produces a clean, even burn with minimal soot. Pour into apothecary-style glass jars, vintage teacups, or clean ceramic bowls and the finished candles become both functional decor and genuinely thoughtful gifts.
The Key: Add fragrance oil when the wax temperature drops to 185°F — too hot and the scent burns off before the wax sets; too cool and the fragrance won’t bind evenly throughout the pour.
17
Entryway Coat Hooks
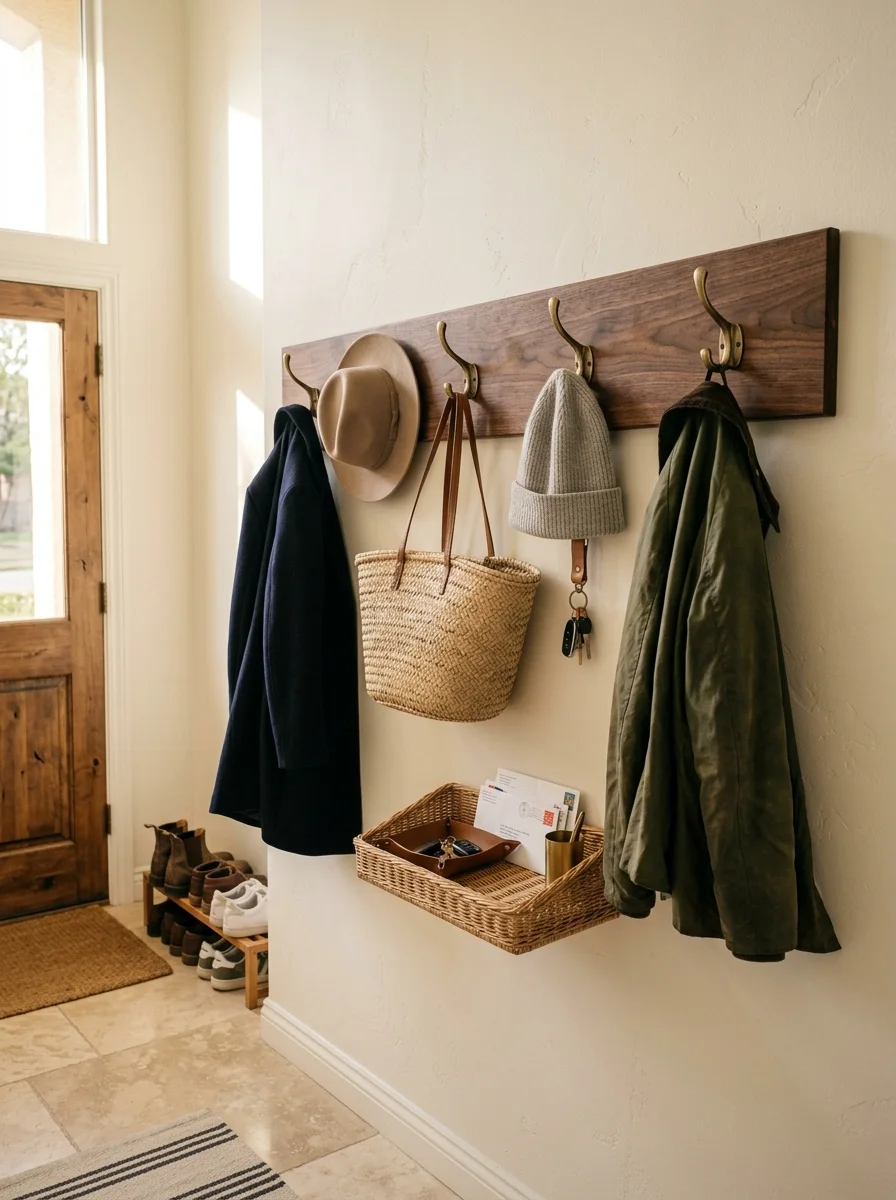
The entryway sets the tone for every room beyond it. A DIY wooden hook board — stained walnut with five evenly spaced brass hooks — transforms a chaotic pile of coats into an organized, styled welcome zone. It takes less than an hour to build and costs under thirty dollars in materials, yet the result looks like a considered furniture purchase.
This is one of those small-scale DIY home projects that improves your daily life in ways you feel immediately. Coats have a place. Bags have a place. Keys stop disappearing. And every time you walk through the front door, instead of chaos, you see something you built yourself — something that looks genuinely good and works exactly as intended.
The Key: Space hooks at least six inches apart to prevent coats and bags from overlapping — crowded hooks defeat the purpose and make the wall feel cluttered rather than organized.
There is something deeply rewarding about changing your home with your own hands. No contractor, no waiting, no enormous bill — just an idea, some materials, and a free weekend. These 17 DIY home projects prove that beautiful spaces don’t require a designer’s budget. They require a little time, a little effort, and the willingness to try. Start with one project this weekend. Maybe it’s a floating shelf, a painted wall, or a set of concrete planters. Finish it. Stand back and look at what you made. That feeling — that specific pride of a room transformed by your own work — is what keeps people coming back to create more. Save this article for later, share it with a friend who loves to make things, and remember: your most beautiful home is one weekend project away.